Wednesday, March 16, 2011

Treadles and Tea Time

Treadles and tea time, look closely to find the tea cup. Treadles and tea are themes in my home with quilts thrown in here and there. The photo was taken for The Quilt Life magazine.

1889 Singer Model 13K is nicknamed Scotty
 Ah, here it is, close-up, beautiful roses on a soft mint green color.

Lovely tea cup
Label
The first photo is featured in the April 2011 issue of Ricky Tims and Alex Anderson's magazine, The Quilt Life. Ricky wrote the article on eco-friendly quilting. It features his 10x12 foot hand crafted log cabin in Colorado where he retreats for tranquility. What he most enjoys is his Singer treadle sewing machine.

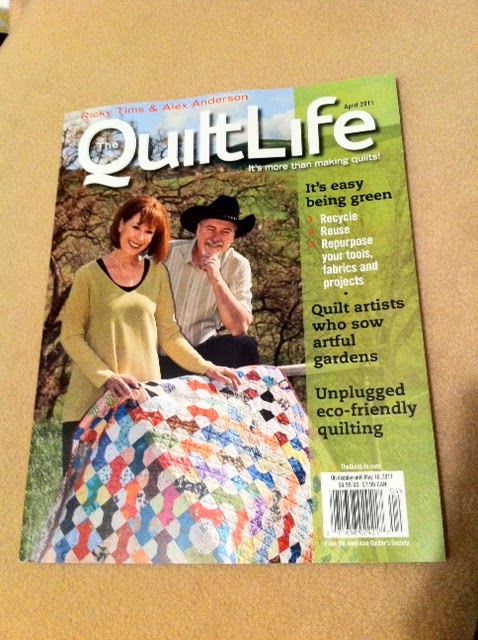
In 2002 Ricky came to our quilt guild in Fresno and gave a workshop. I took a treadle sewing machine, yes, it is a little bulky, not exactly a Featherweight Singer, but that is all I have used, are treadles, since 1993. I remember Ricky flipping the leather belt on my machine, curious about how snug it was.


Ricky called me several months ago to talk about treadle sewing machines for his article and asked me to style a photo with some of my quilts on a treadle. He quoted me and mentioned my website and my YouTube videos.


http://treadlelady.com
http://www.youtube.com/user/TreadleLady

The article is on pages 50-53.

Pages 50-51

Pages 52-53
My photo on page 53

Tuesday, January 18, 2011

Tea Set from Prague

Many years ago I realized I go through a bit of post Christmas blues, my remedy has been to start a fun project right after Christmas. The blues this year have been the worst but I'm over it now, for the most part. :)  There is so much to look forward to and so many things for which I am thankful. I'm willing the blues away.

Now that I've discovered the wonders of sharing on a blog I'm going to be happy! Since I've decided to participate in Tea Cup Tuesdays my wheels are turning with tea cups and other things I will be sharing, what fun it will be.

Loucky Czechoslovakian Tea Set

Since I've been blue I will show my midnight blue and gold tea set purchased in Prague in June, 1991. We were there the weekend the last of the Russian troops were leaving Czechoslovakia so everyone was happy.

What a gorgeous city. We ate, walked the streets and squares, ate again, drank beer, drank wine, ate some more and shopped for a weekend. As we stood near the Saint Charles bridge and saw a row of little dingies I commented that in 10 years it would probably be a row of yachts.

Cup & Saucer

The set is rather formal and stiff but it appealed to me to have a complete proper tea set with six cups and saucers.

Nesting cups

This is the way the Dutch nest their cups on the stack of saucers, these make an almost perfect square.

Nest handles into next cup

Each handle goes into the next cup. It doesn't work well with tea cups that flair.

Sabina  Loucky  Czechoslovakia (tiny blurred lettering)

All of the stamps on my set are not easily read, in fact, I didn't know it said Czechoslovakia till I searched the internet and found the label.

Open teapot and lid. Lid has no tab.

One major problem with the set is the teapot lid does not have a tab, you must hold the lid on while pouring otherwise it will fall off. It is so easy to forget so I found a solution.

Clear stretch bracelet cord is almost invisible, looped from handle to spout.


To prevent the lid from falling off I used a loop of stretch bracelet cord, it is looped around the handle, goes over the lid and around the spout. Maybe you can see it in the photo above.


Teas set on the original packing box

Label on box bottom

Tomorrow afternoon I will officially wash away the post Christmas blues with a pot of tea using this tea set. Hubby and I will have home made Dutch speculaas, the spicy dough is resting over night for the flavors to blend.

Happy Tea Cup Tuesday,
Donna

Saturday, January 15, 2011

Candlelight


Brass Orient Express Lamp Repro early 1980s
Everything seems so bare now after putting away the Christmas decorations this week.

Touches of light around the house will help ease the dark, I'm already wishing for longer days and spring. I learned a lot about light the three years living in Holland.

The Dutch use lighting to evenly bathe a room in soft light. I remember visiting a frugal friend's apartment one evening. The lighting was amazing, a couple of electric cords across the room with very low wattage light bulbs every few feet. Each light had a white paper shade taped in place. I thought it was a little hazardous but it sure was nice looking. Everywhere you go there seem to be multiple lights in rooms and buildings. It eliminates the dark areas.

I grew up in mostly old apartments with a bare light bulb hanging from the center of the room, nothing charming. Now I like light in a room from several sources. I realize how important it is and wondered how my dining room would look with only the ceiling chandelier as it was when our home was built in 1997.

Standard chandelier from 1997
Above is my dining room with only the bare standard chandelier, not an upgrade. One light source is not enough.
Dimmed light, shades on chandelier, lights on buffet and two candelabra
Now, this makes everything more warm and inviting on a winter night. After several years in the house I added the shades and a dimmer to the chandelier, then the lamps on the buffet. The table is soft with light from the candelabra, a McFrugal's find in 1994.
Candlelight makes everything shine and sparkle
For years hubby and I ate by candlelight every night except in summer. Leftovers taste better by candlelight, it didn't matter what we ate, it made it so much nicer. It got harder and harder to find reasonably priced tapers so the candelabra have not been on the table regularly the last 3 winters. At Thanksgiving I had a glass chimney with one candle. One day I sat looking at the one candle burning and realized how I've eliminated something so joyful. I dug out the candelabra for the Christmas season and vowed to have them burning and warming our lives at mealtime for the rest of the winter.


Tuesday, January 11, 2011

The Tuck Box at Carmel by the Sea

Hello Everyone,

This is my first Teacup Tuesday and I'm fairly new to blogging so please excuse me if I faux pas. There is not a teacup in site in this entry, just one of the most enchanting places to eat and have tea, at the Tuck Box in Carmel-By-The-Sea, California.
The Tuck Box built by Hugh Comstock in 1927
Carmel became known as a storybook hamlet in the forest. It was because of Hugh Comstock who built the first fairytale house in 1924 for his wife Mayotta. She made and sold Otsy Totsy dolls and needed a place to display them. For $100 he built the first house, The Doll House, later renamed Hansel. Comstock built a second whimsical house then Gretel and continued to build houses, he was called "Carmel's builder of dreams." Others started to also build in the style and today architects are designing homes that have similar charm but with modern amenities.

The Tuck Box was built in 1927 and first became a tea room in the 1940s. Ownership has changed a few times over the years but the charm of the hand crafted house remains. I've had meals and tea here a few times since the late 1970s. These photos are from a visit in August, 2009, it was an unusually quiet Friday afternoon, I snapped a few pictures avoiding people. Next time I will need to include people to get the proportion of the small house.
Just inside the front door
Just inside you can see the roof pitch starts at the top of the windows.
Waiting area by the window
Many times the tiny waiting area is full and people are waiting outside. The tables are set with simple green paper place mats and paper napkins. Oh! There are two tea cups at the table, very ordinary restaurant quality, as it has always been the times I have visited. I go for the ambiance of the dreams in the architecture.
Service area in background

Scones, preserves and whipped cream
Many of the recipes continue to be used but I do miss the roast beef meal that used to be served. The scones have not changed, years ago I was told they were Scottish style. What happened to our tea cups on the table? It's time for another visit for more photographs.

Beams and water closet door
The water closet sign is appropriate, it is a little coat closet sized rest room with a toilet and tiny corner sink just big enough to wash your hands.
Table legs
The table legs have lots of wear, just adds to the charm. I took this so hubby can make a similar table for my dream tea house, Dutch style.
Out of focus, shelves and teapots
The Tuck Box is casual, no lace or tablecloths, the minimal decor allows the  architecture to stand out. Comstock used pine needles in the plaster and hand cut every shingle. Visit The Tuck Box website to see a couple of early photos, one on the About page and one on the Wholesale page. You will get a sense of the proportion of the building with people and cars.

If you love the charming Carmel architecture see my August 29, 2009 entry to Casanova Restaurant.  

Next week, on Tea Cup Tuesday, I promise to be more on topic with teacups and maybe my teapot wall. To cheat a little you can see my January 4 entry, last week, it has a cinnamon drink served in a mismatched teacup and saucer. It warms a tummy and brings back memories of my wonderful Mexican grandmother.

Maybe by then I can figure out why some of my entry titles are invisible unless you scroll over them, same thing on the archives and some labels, grrr. I visited the help entries and checked settings and design and don't see how to correct it.

Stay cozy and warm,
Donna

Saturday, January 8, 2011

Tortillas

Tortillas in a towel I wove in the early 1980s
Princess Lisa called me this morning, she and Doug were on their way to China Peak to ski for the day. In her sweetest voice she suggested I come over when the boys get home from school. "And maybe you can make dinner for us," it was a statement, not a question.

By noon I was craving the home-made chorizo that was in their freezer, left over from Christmas brunch, none in my freezer. Eggs and chorizo burritos with home made tortillas and a bowl of fresh pinto beans would be great this cold winter day. Breakfast for dinner is fun on occasion.

Let's make tortillas. Watch the videos on rolling and baking tortillas.

This recipe calls for lard, don't panic, it is only 2 tablespoons to 4 cups of flour, very little. During my years of cooking lard was used, then for many years margarine was recommended, then butter and now we are full circle, lard is no worse than butter. For tortillas lard is the traditional fat.

Tortillas

4 cups all-purpose flour
1 and 1/4 teaspoons salt
1 teaspoon baking powder
2 tablespoons lard (do not use oil or shortening, use lard)
water, about 1 and 1/4 cups, more or less

Whisk the flour, salt, and baking powder together in a mixing bowl.
Dough is smooth and elastic
Mix in the lard with your fingers until the flour resembles cornmeal.
Add water and mix until the dough comes together.
Place on a lightly floured surface and knead a few minutes until smooth and elastic, or put in mixer bowl with a paddle attachment and mix till smooth and elastic.

Cover the dough and let it rest 15 minutes, it must rest.

Divide the dough into 24 equal pieces and roll each piece into a ball, lay on a cookie sheet so they do not touch.


Cover and let rest 20 minutes, don't skimp on the rest period.
Cover balls with plastic

Preheat a flat iron grill, see mine on the November 30, 2010 entry about iron cookware. Heat to medium to medium-high, it depends on your stove and grill, too hot and tortillas burn quickly, too cool and they take to long and will dry out.

Start rolling from the center, up then center down
Sprinkle a little flour on board, smooth out to even layer, lightly flour a rolling pin.
Roll from the center of a ball of dough and up, then roll from center and roll down.

Turned, ready to roll from center up and center down

Turn halfway, again continue rolling in same manner till tortilla is thin, 1/8 inch thick or less.

Getting bigger, ready to turn


Keep repeating same sequence

Roll till less than 1/8 inch thick


Flip onto grill and cook until bubbly and golden; flip and continue cooking until golden on the other side. 


Place the cooked tortilla in a folded dish towel.
Continue rolling and cooking the remaining dough balls.

Making a batch of tortillas has always been great mental therapy to me. There is nothing more comforting than a tortilla off the grill with a light coating of butter. If the weather is hot I keep a glass of iced tea handy to sip while rolling and baking tortillas. 

After dinner the cooled tortillas can be put in a zip lock bag, without the towel.
For a sweet treat you can heat a tortilla on the hot grill, smear a layer of butter on and sprinkle with cinnamon sugar, yum yum.

Finished stack ready to go


Under side of my board has hard rubber feet

Feet keep board from moving back when rolling
I wove the orange linen and cotton towel in the early 1980s when I was weaving for fun with a group of ladies in China Alley in Hanford, California. The towel just feels good and it's been my tortilla towel ever since.

Please leave a comment if you try my tortilla recipe.

Tuesday, January 4, 2011

Poffertjes

Dutch poffertjes were a big hit over the holidays, Lisa has been raving about how much she likes them. Here is a partial batch being made in my little iron poffertjes pan, it was shown in the iron cookware entry.

Poffertjes are little puffy pancakes, recipes vary, with yeast or with baking powder. These luscious little babies are a yeast batter and I served them with cherries and powdered sugar, the only snow we've had in Fresno.


In Holland during the summer months you often see a poffertjeskraam in large parks or events. Our favorite was in Laren, it is up from March to September. Their history is more than 100 years, see their website. http://www.poffertjeskraamlaren.nl Notice the huge antique stove with rows and rows of depressions.

Canela, Mamanie's Cinnamon Tea

Canela or cinnamon tea with milk and sugar
What a whirlwind Christmas and New Year season. Yesterday morning I woke up feeling sluggish and with a headache. I rarely get headaches but there it was, maybe it was from several days in a row of two glasses of wine at celebrations, my usual is only one glass.
Canela or cinnamon tea before milk
Cinnamon tea would hit the spot, I had some in the frig that just needed heating in the microwave, add a teaspoon of sugar and top it off with milk and warm again. Ohhhh, memories of Mamanie, my Mexican grandmother who made canela or yerba buena tea when we were not feeling well. I know it's not really tea but it soothes the body.

After sipping two cups of canela, Mexican word for cinnamon, I realized my headache was gone and it didn't come back.

To make canela I boiled two sticks of cinnamon in two cups of water, simmer for 10 minutes. Pour half a cup of the herb tea, add a teaspoon of sugar or honey and finish with milk, I use fat free. Heat if needed and it's ready to enjoy.


Did you notice my cup has flaws in the inner design, little white circles where the color didn't take. I bought four cups and saucers at the seconds shop at Villeroy & Boch in Luxembourg. That was during a shopping trip in 1992 with women from the American Women's Club of Amsterdam while I lived in Holland. The cup and saucer patterns are different, the cup is the Persia pattern and saucer is Flora Bella but they coordinate.

Sunday, December 19, 2010

Nativity Scene

This beautiful nativity scene in our neighborhood has been displayed at a corner home for the past five years. It expresses the true Christmas, Christ's birth. The King is born in Bethlehem.

Sunday, December 12, 2010

Gingerbread House

Turn up your speakers and watch the 31 second video,  below,
to hear about this little gingerbread house.

Thursday, December 2, 2010

Christmas Tree

Christmas trees with ornaments from throughout the years are my favorite because they are so personal. As each ornament is hung you remember that person and that year. Some of those people are still in your life, others lost to time and moves.

Our tree for the last 10 years has been an artificial tree with attached lights. After several years we quit using the bottom and now have it smaller on two of my old iron ladies, treadle sewing machines. This is the view entering the front door, the teapot wall, turn top card table and tree.


The next view is from the livingroom, all set up with a cozy fire and mantle decorated with silverplated Wallace bells. The first bell was 1979 from my boss, Ray Wilshire, when I worked for him in Hanford, California. It was such a beautiful large jingle bell I collected a few more over the years and even found an older one with a 1971 date.
(Click on Read More to see some of the ornaments)

Tuesday, November 30, 2010

Iron Cookware and Corn Stick Recipe

My iron skillet was banned to the dark corners of cupboards for years when I went through the phase of non-stick skillets, they seemed like magic, they were so lightweight. Non-stick skillets seemed great at first but they chipped and warped quickly, even when you were careful not to use metal utensils. After some years I realized certain foods just did not cook properly or tasted as good. Besides that there are health benefits to cooking in iron.

I went back to my iron skillet in the late 1980s and realized it was non-stick also. There are two important things about iron cookware. One is the skillet must be seasoned, some iron cookware comes pre-seasoned. There are many directions on the internet for how to season iron cookware so I won’t go into that. Secondly, the cookware must be properly heated to prevent sticking. Let it preheat well starting on low, heat at least 5 minutes and it will be non-stick, even cheese will pop right off on a well heated and seasoned skillet. Notice the following two photos, at the front is a piece of cheese directly on the skillet and after popping it up, yummy cheese wafer. Preheating the skillet to prevent sticking is not often mentioned, that had been my problem many years ago.


While putting away an iron skillet I realized how much iron I have, here is my selection.


On the left are three corn stick pans and three skillets. There is nothing like good crunchy corn sticks to go with soup, stew or chili. I started with only one pan in the late 1960s but seven little corn sticks is not enough so over the years I bought a second then a third, all three fit in the oven with an inch between for heat circulation. When making corn sticks or cornbread put the cookware in the oven while it preheats. Pull it out, oil the cookware then add the batter, you will have nice toasty food.

Next are the three iron skillets under the corn stick pans. One is thinner, Wagoner brand, I don’t like to use it. My favorite is my newest Lodge skillet with a long handle on one side and a loop handle on the other side, it makes lifting and moving it much easier.

On the back right burner is a wok I purchased when we lived in Holland between 1990 and 1993. I had never seen an iron wok before and bought it new at Hema, a chain department store. In the wok is a Lodge 4 quart Dutch oven that Hubby uses for no-knead bread.

The pan with 19 shallow round holes is a poofertjes pan, not an ebelskiver pan. I bought it at a rommelmarkt, flea market. Dutch Pooferjes are more shallow than Danish ebelskivers. Pooferjes are little puffy pancakes made with a yeast batter and served with butter, powdered sugar and often with strawberries. Check out pooferjes on YouTube, the professionals bake 100 or more at a time. They go down the rows, flip flip flip flipping each to the other side.

The flat grill in front is for making tortillas, I’ve owned it at least 30 years. Flour tortillas are made on a dry flat top, no oil. Another day I’ll go into tortilla making.

 A myth about iron cookware is that you cannot wash it with soap and water. Of course you can, just do it quickly and dry it immediately, we set the pan on a burner to dry it well. Too many times we have forgotten that a burner was on so we set a timer for several minutes to remind us to turn it off. Iron does rust so don’t let them sit in water. A blue Scotch Brite non-scratch scrubbing pad works well to clean and not damage the seasoning.


Corn Sticks Recipe

1 cup all purpose flour
1 cup yellow cornmeal
1 tablespoon baking powder
1 tablespoon sugar
1/2 teaspoon salt
1/4 cup butter, melted
2 eggs
1 cup milk, microwave a few seconds to slightly warm

Put two corn stick pans in oven to preheat to 425 degrees Fahrenheit.
In a mixing bowl mix the 5 dry ingredients, a whisks works well.
In a small bowl whisk the eggs, add slightly warm milk and melted butter.
Pour wet mixture into dry ingredients and whisk together.
Pull out hot pans, oil each corn stick depression, use a heat resistant brush.
Pour batter into corn stick pans.
Bake 18 to 20 minutes till lightly browned.
Turn out onto a rack and eat immediately, they are best still warm.


 Reese and Davis last week with basket of corn sticks.
Lisa and Doug with a tummy warming meal of lentil stew,
corn sticks and red wine.